Monday, April 30, 2012

Antique Samplers

I love the way time can transform pretty much anything into something beautiful. 


This stunning piece can be found on the lovely quilting blog Cactus Needle. An ancestor of the blog's owner, Nedra, stitched this sampler in the 1850's.


I've always got an antique sampler in the works...they are my favorite. I've seen some gorgeous old samplers from early America and they all had that beautiful patina of age. I wanted that look for my own stitched works, so I came up with a way to get that antique look.


The blue sampler above is titled "Rhapsody in Blue" by Fouroaks Design, and the one directly above came from the book Splendid Samplers to Cross-Stitch by Chris Rankin.

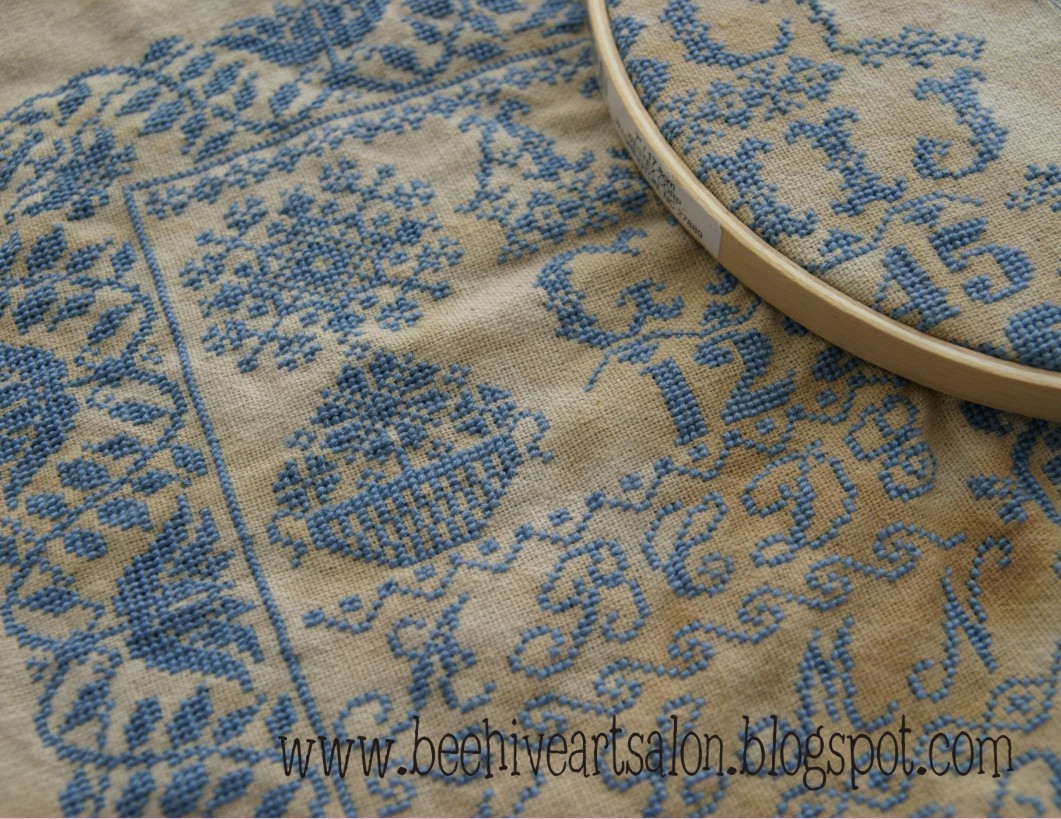
First, you really don't need to spend a lot of money on fine linens for your pieces.  I found a similar type material in the fabric section at Walmart that I have been using for years. Its nice and sturdy, equals about a 22 count linen, and is already a buff color.  It's not polished and smooth like muslin, but instead has a great home-spun look and feel that I think lends itself wonderfully to the antique look.


Before you begin staining your fabric, you'll need to sew up the raw edges so you don't end up with a fraying mess during the whole process.  I don't do anything special, just a simple straight stitch to hold the edges under.  I like to machine wash and dry my fabric after I have sewn it.  This takes out the stiffness and also pre-shrinks the fabric.


Wet your fabric, squeeze as much water out as you can get, then lay it onto an old jelly roll pan covered with foil.  You can use your nice new jelly roll pan if you want to, it won't hurt it.  The wrinkles in the fabric at this point help add interest to the stains.
Now, using a brush and some watered down walnut ink, brush the fabric to stain it.  Be as perfect or uneven as you want.  I myself prefer a very uneven look.

After you have covered the fabric with the walnut ink, add a second color to give your fabric an amazing pop.  I use watered-down yellow ochre acylic paint.  Just a tiny bit in about three different spots.


Finally, you'll want to add a final layer that really gives the look some dimension.  Take some walnut ink, not the watered down stuff you used before, but straight, dark, gorgeous walnut ink. Drop it onto your fabric in about three different spots.  Don't mess with it, just let it do it's thing.  This is my favorite part.


Set the whole pan in the warm sun, on your counter, or in a warm oven to dry.  I prefer the sun when drying anything stained with tea or walnut ink, but that's not always possible.  I sometimes use a warm oven set to 170 degrees.  Please keep an eye on it if you are doing the oven-drying method! I've never had a problem, but everyone's ovens are different. When your fabric is dry, iron it out and see how beautiful is has become!


My name is Marilyn Healey and I've been creating art my entire life.  It was great fun sharing this technique with you!


Friday, April 27, 2012

Wedding

What do you do when your daughter decides in mid October to get married five days before Christmas?  You quickly plan a wedding.  Actually here in Utah Valley a two month engagement is a very common occurrence.
Before my daughter decided to get married my year had been full of tennis and other things that didn't involve any creativity.  I hadn't done anything creative for months.  The challenge of taking a church cultural hall with ugly burlap looking walls and basketball hoops and transforming it into something beautiful got my creative juices flowing again.

We chose to have the wedding reception at our church because it was just blocks from our home and within two miles of 80% of the people who would be coming to the reception.  We realized that five days before Christmas nobody wants to travel more than a few miles from home.


So how do you transform a church gym into a place for a wedding reception?  Well thank goodness for Pinterest.  That is where I got most of my ideas.  We hung lights across the ceiling and then hung paper lanterns, all different sizes from the lights.


Costco had the flameless candles on sale right before Christmas so I bought boxes and boxes of them and placed the candles all over the tables.


We brought a few pieces of furniture and a rug from home to provide different seating.


Earlier in the year I made a wreath from rolled up flowers made from book pages.  I took that idea and made rolled up flowers from sheet music and art paper and set them on the tables.  We also used burlap on the tables to tie in the burlap looking walls.  We Made a beautiful backdrop with Christmas lights, sheer drapery panels, PVC pipe and burlap.


I'm Sherri the one in the middle.  I'm from Orem, Utah the mother of five.  I love Art, baking and tennis.  My favorite kind of art to do is colored pencils, photography and mixed media.

Wednesday, April 25, 2012

Creating Collage Backgrounds


"Floating Mushrooms"
some of the papers used are from the artist Anahata Katkin

What does it take to make a interesting collage background, that gives way 
to light, dimension, and texture? 

I started making collage backgrounds at the Art Nest in 2008, with artist Misty Mawn, and Sally Jean Alexandra.  Since then I have taken classes from many mixed media artists, like Anahata Katkin, Pam Garrison, and Stephanie Lee.

What have I learned from these artists is really quite simple.  Don't Think! 


"Windows of Light"

I know what you are thinking?  How do you do that?  Here are the steps that I have learned, and am still learning on my own artistic journey.

  1. Have your supplies ready. I like to either start on thick heavy watercolor paper, or vintage wallpaper (the ugly type) that is strong and sturdy. Set out your paints, glue, and paper collection. I use golden gel medium for adhesive, and some of my favorite paints are yellow ochre, burnt umber, and titanium buff.
  2. Prepare your surface.  Give your background a coat of gesso if needed.  I only do this if I am using something other than watercolor paper. You may want to do this a day in advance, to let it dry completely.  This allows for a good sticky base, and will save your paints from playing tricks with your color palette.
  3. Start gluing your papers down.  I have a collections of black and white copies of architectural  buildings and spaces that appeal to me, also wallpapers, newspaper clippings, vintage scraps, and words are a good start. I like to use a brayer to flatten out the paper as I go.
  4. Try not to compose your work, just let it develop however it does.  I know when I am trying too hard.  I am in the "think" zone.  You want to be in "the flow" which means that you are relaxed and the composition is flowing out of you.  This takes practice.  I am still working on this.  Artists who have felt this are very aware of the difference.
  5. Use your inner artist, for me this means using my hands.  I like to put down the paper, glue and paint with my hands at first, this allows me to add paint with the medium and saturate the background with light or dark.
  6. Resisting. Try no to take a break when you feel resistance this a natural process, and working through this will give you the ability to see the work  differently.  Try looking at the work standing up,  turn your work around, try it in a different room with additional lighting. 
  7. To tie the work together, use one color over the top of the piece, then quickly wipe it off where you want emphasis.  I like to use burnt Umber or Titanium Buff.  Then use wipes or a wet cloth when bringing out the color hues.
  8. Use your finished backgrounds for journals, as a background for another piece of work, or just as is.  I have a hard time cutting them up, so I have a pile that I don't really now what to do with yet. 
  9. Enjoy the process, making art is not a means to an end, but a process of expression and delight. hey that sounds like a quote, blah blah blah, If you are still reading this you are either bored out of your wits, or you haven't quite had enough caffeine for the day.  I  do believe.... What???  no matter how a piece is finished it has the ability to move us forward artistically, and is an expression of our creative journey.
  10. Start again.. See quote below, and if you made it this far, make a comment below telling me "why you need to create art" and I will select a random winner to receive a box of my favorite art supplies for making a background.  You deserve something free for getting this far.

"a work in progress"

I  did find this fabulous quote here which applies to every medium, or anything really.

 To be a photographer, one must photograph. No amount of book learning, no checklist of seminars attended, can substitute for the simple act of making pictures. Experience is the best teacher of all. And for that, there is no guarantee that one will become an artist. Only the journey matters. - Harry Callaha

"Summer Nights"
 Rena, Shannon, Diana, Cheryl, Amanda, and Julie

Here's to the journey....


Candice and little Gracee ( my shadow)


Monday, April 23, 2012

Art Tribe


Remember that song from Sesame Street, “One of these things doesn’t belong here”.  Well, if all the art friends lined up and that song started playing…I would be the “thing” they are singing about!  
I'm a "W" in a room full of "2"s


Unlike all of these sweet and wonderful “art sisters”, I am loud, I am obnoxious, I cuss like a trucker and have very little natural artistic talent!  Does that matter to them…absolutely not!  Years ago, one of our sweet friends, Rena and I had a conversation about how important it is to belong to a “tribe”. 


My family - 


By the way - I'm Emily Mortimer (I'm the old gal in the middle - not the pretty off to the left).  I am fortunate in many ways.  I live in the house I grew up in.  My little family and I live surrounded by aunts and uncles, cousins, friends since childhood, and my siblings near by.  Add to this a community of my parent’s friends, their children, neighbors, my church congregation…and my life is full of people.  Wonderful people!  People who have influenced my life in so many ways – mostly for good ;)  As I met my sweet art friends, I added them to my “tribe”.   I LOVE these friends.  I love that we have diverse backgrounds and life situations.  I love that none of that matters.  I love that we support each other, laugh with each other, cry with each other, mourn with each other and celebrate with each other.  Shouldn’t everyone be so fortunate? 

In the past few months I’ve take some on-line courses from the lovely Terri Brush and the adorable Jeanne Oliver.  Both of these women have created Facebook pages for the class participants.  It’s been a place of sharing and encouragement for students to share their creations, ideas, tricks and tips.  I’ve been amazed at the generosity of complete strangers, and it just reaffirms to me that in this world, we all need each other.  We all need a tribe.   That’s one of the reasons I’m so excited about this blog!  We want you to join us, create with us, laugh with us, and possibly cry with us!  We want everyone to have what we have…an art tribe. 
Inspired by Jeanne Oliver's e-course
Now – on to creating!  I love metal.  I love patina, rust, chipped paint and all other manner of character on metal!  I also love jewelry.  I remember as a child scouring the Utah desert with my family - looking for beautiful rocks and arrowheads.  My father would then take the rocks to a friend and have them made into jewelry for my mother.  I treasure my mother’s jewelry, and I’m sure those memories helped develop my love of all things “earthy”. 


Leather cuff embellished with vintage door hardware
This simple bracelet is made from rusty vintage door hardware, simply wire wrapped to a leather cuff.  In the center of the hardware is a vintage earring secured in place using either resin or clear caulking.  I have had so many compliments on this bracelet…and the best thing?  It gets more comfortable each time you wear it!

Friday, April 20, 2012

WOULD YOU LIKE MUSHROOMS WITH THAT???


WOULD YOU LIKE MUSHROOMS WITH THAT???


I am excited to have my first blogging experience on Beehive Art Salon!  My name is Deb Beeton and I live in Orem, Utah.  I am a full time wife and mother of 6 great kids!  I spent my college career studying other people's artistic expressions in a BA degree in humanities.  After I had my own family I realized through my own artistic endeavors in photography and colored pencil,  I WANT TO DO ART!  So I love to try many different mediums depending on my mood and my courage.  After all, Art takes courage doesnt it?   I appreciate having a family that will indulge my artistic muse every once in a while with a smile and a nod.  They know as long as my hands are busy I am happy!

When I was a little girl I was fascinated with terrariums, they looked like mini forests to me.  I imagined little elves and fairies living near the trunks and taking shelter under leaves and running around the woodlands.  I had a fun experience making some adorable felted wool mushrooms.  Our art group made a woodland tree with all sorts of woodland animals and mushrooms and we donated it to a local auction that benefits women and children in need.  Through this experience I learned how cool the process of felting is!  I love the simplicity of the mushroom shape and I just think mushrooms are adorable.  You could make yourself a few and use them in a terrerium, make a charm, stick a few in a jar or hang them on a spring tree.  I put some in this potted plant I have displayed with some beautiful lime green moss I got from a local garden nursery here in orem.


First you need a felting needle.  Its not an ordinary needle.  It has little barbs near the tip that grabs on to the wool and felts it. (You can get them at Joannes) THEY ARE SHARP!  ( I found out the hard way)  The tip is very fragile so you dont want to bend it as it will break off and you cant use it.


You can get a "felting block" as you see here, or use a big piece of upholstry foam.  It is a place to sculpt your mushroom so your needle has a place to go as you felt.  Wool Roving is what the wool is after it is combed out but not spun into yarn yet.  100% wool.  It is available at joannes in a few colors.  I got mine at a place in provo called Heindslemans which specialize in different yarns.  It is about 9$ for a pretty big bunch and they have great color selection!
Let's start!  I started with the stem here.


You roll a little wool and then poke, poke, poke, with your needle up and down quick motion (like a sewing machine) into your wool and create a shape. You get faster as you go! Its like sculpting with clay but you are using wool and a needle.  The stem starts small you can add and make it as thick as you want. I keep adding roving until its the size I want.  I made a tiny charm here but the first picture in my post is a little thicker and bigger.


                                                                       Watch your finger tips!


Next is the little mushroom cap. I grabbed a little roving because my mushroom will be a charm so I dont need as much. I strart out with a blob then stick the needle in to start forming a shape. It almost looks like a little raspberry. It can seem a little tedious but stick with it.  Poke in the same spot like 20 or 30 times you will see it fusing together.


always have your needle strait dont try to bend it to sculpt.  use a strait up and down motion. Until it is the size you want.


At this point is where you would want to add the metal post for a charm. I got one that has a loop already in it. Just stick it in the cap and twist then add your stem to cover it up. You fuse the cap and stem together using the poking motion of your felting needle. dont let the needle hit on the metal.

I added a few little spots on the top of my mushroom cap.
And VOILA! You have a mushroom!

Here are a few more! What am I going to do with all this fungus? (hee hee)


I love spring!


Wednesday, April 18, 2012

Wacky for Washi Tape

One of my favorite embellishments for just about any project is washi tape.  I am always looking for things to stick it on!  Here are some ideas to inspire you in whatever you are creating today...

(planner from Russell + Hazel--my FAVORITE!)


don't you want to go tape your phone now?!


a little too late, but aren't these darling for Easter?
 washi flowers from Amy Tangerine

What do you like to do with your washi tape?


Monday, April 16, 2012

Hidden Treasure Hunt


               One of my favorite things to do in my spare time is to go into Cats Cradle antiques store (located in Provo Utah) and spend hours rummaging through baskets and drawers of  “Bags-O-Stuff” (bits of broken jewelry, buttons, watch parts, vintage millinery, etc.) I have been successful time and again finding fun pieces to then turn into my own accessories. I love creating new jewelry using vintage parts so this is the ideal shop for me!  
 

     You can also find pretty vintage trims, laces, buttons and many other parts and ideas for making art and mixed media projects.
      
       This past Christmas I really wanted my husband to get me a gift that was a total surprise because I knew everything I was getting, and he often just puts my presents unwrapped under the tree or in store sacks. I repeatedly hinted to him that I would love anything from Cats Cradle. I said I’d love a Bag-O-Stuff! Christmas morning came and to my dismay I didn’t see anything extra under the tree. He waited a few moments then proceeded to send me on a hidden treasure hunt. He told me to go downstairs to a room that would one day be my craft studio. He had hidden several perfect gifts! The first was an adorable (green with chippie paint) medicine cabinet for my craft room bathroom that said “Open me“.


Inside the cabinet were my very favorite treasure! Frozen Charlotte Dolls!!!
     I’m unsure why these dolls are so fascinating to me, but with all the electronic devises today such as iPads, video game controllers, TV, I imagine a much simpler life where little girls had tea parties and played with their tiny dolls without saying “Mom, we’re bored”. the little girls were so grateful they had these dolls to play with because often that was the only toy they had. I imagine making fun clothing for them, using tiny leftover scraps of lace.
               He also gave me these amazing sterling silver charms!


 Thankfully Glen and Gary at Cats Cradle Antiques were able to help my husband pick out the perfect surprise gifts! I can't wait to see what Glen brings in next!


Hi I'm Shannon Porter, I live in Springville, Utah, and I'm so blessed to be part of this amazing group of ladies! I met some of the ladies in our group while taking a PMC clay class from the talented Sherri Haab, and have been on an a fabulous artful journey since!