Friday, March 1, 2013

Hand Dyed Silk Velvet

I know, I know.  We promised this post would be a video.  Due to technical difficulties, we are just posting pictures this month.  Sorry!  We'll figure things out by next art group....


from Julie's blog
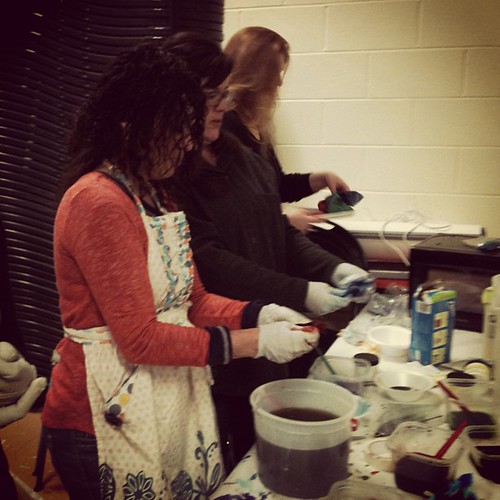
What an experiment art group was this month!  After eating some AMAZING chinese food our current fearless President Heidi brought, we mixed up 16 colors of dye and had a blast dipping and dripping and coming up with the most beautiful colors!!  


Julie was our resident expert for dyeing.  She's besties now with all the great people at Dharma (the site we ordered all the dyes from) and walked us through the process.  By the way, they have great customer service and will do their best to answer any questions you have about their dyes and the dyeing process.
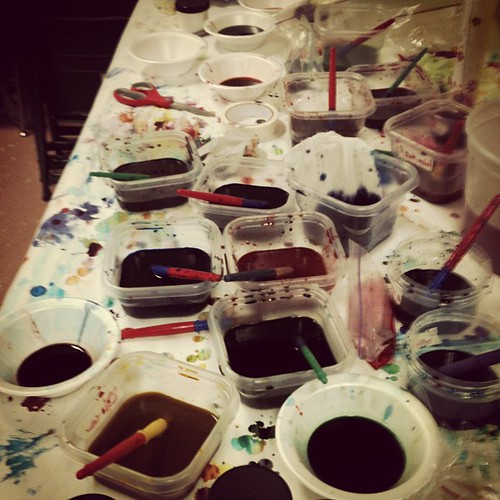
what a mess!

To begin, you will need:

  • a plastic tub full of warm water (to pre-soak your velvet)
  • plastic bowls for the dyes (however many you are doing) labeled with name of dye
  • dye
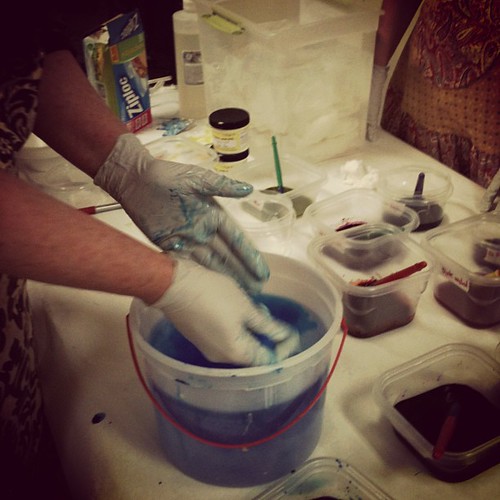
  • RUBBER GLOVES (just take a look at the only person who didn't wear gloves at art group--she's the one walking around with blue hands! Deb)
  • paint brushes for each dye
  • another plastic tub with water for rinsing (you could also just use your sink)
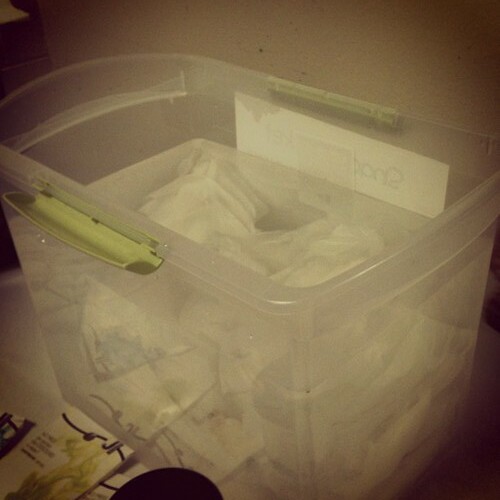
  • a microwave (this should be a junker microwave-not something you'll use for food ever again)
  • paper towels
  • ziplock baggies (size depends on how big your pieces of velvet are)
  • Synthropol (you can buy it here) to wash velvet in before and after
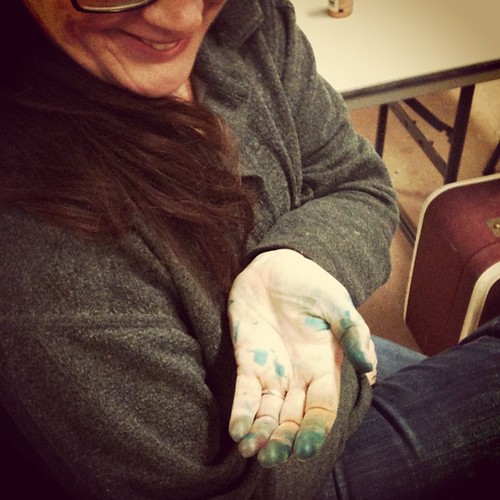
Deb's blue hand!

This is a VERY messy project!  Lots of dripping.  So we would suggest you do this in a garage or put something down on the floor to catch those drips.  


1.  Mix up dyes according to directions.


2.  Put all the velvet in your tub of warm water.  We used white silk rayon velvet.  Julie suggests washing the velvet before and after you dye with a product called Synthropol.  It helps stay the dye.  The tub should have water that stays clear and clean.  We had some issues with people having dye on their gloves and dipping their hands in the clean water.  The dye will color your white velvet, so be careful!


3.  You can either paint the dye on the velvet or immerse it in the bowl of dye depending on the effect you would like.  Because we had so many people doing this at the same time, our bowls of dye eventually had other dyes mixed in.  This was actually a happy accident!  Some of our best colors were from this.  BUT we can't replicate it!  Rats!  Also, the longer your velvet sits in the dye, the richer and darker it becomes.  If you want your velvet to have a washed-out aged look, just put it in for a second and then take it out and rinse it quickly.


4.  For a more interesting aged look, put the velvet in one dye, rinse it out, then dip it into another dye.  For example, I love a velvet I dipped in a teal blue, rinsed it out, then put it in a saffron color.  BEAUTIFUL!


5.  Rinse it out in your bucket of water or under the faucet in the sink and squeeze out the excess water.  If you want a really deep, rich color, don't rinse out in water.  Just squeeze out excess dye in bowl.

6.  Put in ziplock bag and close, leaving a little opening in closure.

7.  Microwave.  The time on this is going to depend on your microwave.  We put ours in for about 45-50 seconds.  Pull out and test to see if it's dry.  Put back in for more time until dry.
Lovely Lorraine

VOILA!  You have some beautiful velvet to use in your next project.  What will you use it for?  We're thinking of using it for a pincushion class we're doing in March.
from Julie's blog

Thanks for coming to Art Group this month Art Groupies!!  Leave us a comment and tell us about your successes (or not) with dyeing velvet.  We'd love to hear from you!

BEEHIVE ART SALON GALS


Monday, February 11, 2013

HAPPY FEBRUARY ART GROUPIES!!
All of us at the Salon are excited to change things up a little bit and bring you our new and improved blog!
Beginning on February 28th, we will be posting our Art Groups in video format (yea!!).  On the last day of every month, we will have a video available to you to view of what we did in Art Group this month.  We will also be posting pictures of our projects and making patterns and tutorials available.  We hope this will help you get to know us better and also provide you with lots of wonderful, artsy ideas!  

Also, many of us will be at the Vintage Whites Market in Salt Lake City on Saturday, March 9th.  Come stop by and visit us!


The Gals at the Salon

Thursday, December 20, 2012

THESE ARE A FEW OF MY FAVORITE THINGS

I seek to find peace and solace.
(Love Shack)

I find great comfort in making things with my hands.
(handmade wire garland with vintage ornaments)
Note: Thankyou Stephanie Lee for your online Off The Chain Class :)
I find joy in creating simple things I treasure.

(handmade ornament of my mother)

(back of ornament)
I long for moments of peace and quiet.

Handmade bead Christmas tree 

I feel blessed.
Thrift store glass house - filled with vintage ornaments
Note: Abode is my favorite place for vintage finds

I hope your holiday season is filled with love and peace.

Diana Camomile Peck
vintage.clementine@gmail.com


Tuesday, December 11, 2012

CHRISTMAS TRADITIONS


     One of my favorite Christmas traditions was when a best friend of my dad's would come dressed as Santa, to our Christmas eve party. we loved hearing him tell stories of how he remembered my dad when he was a young boy. I have a cherished picture of my dad sitting next to him just a few years ago.
My dad looks especially happy with Santa! So sad to lose him in October!

  Here are some other Santa pictures I absolutely adore.


                                       http://justcallmegrace.tumblr.com/post/36932679655
                                                     http://pinterest.com/CBIDdesign/
     I'd love to hear about some of your Christmas traditions or things you remember about Santa Claus! One of my mom's fondest memories was when she got up out of bed one year to see Santa putting gifts under the tree! How exciting is that?! Now tell us some of yours!!!

Tuesday, November 20, 2012

Cirque De Noel

Tis the season...

In each of us there is creativity. In some of us it flows like a rain swollen river and in others it comes as often as rain to the barren desert. But still, there is that spark of inspiration in each of us that comes out in so many ways. It seems to be especially prolific this time of year when our hearts turn to home and loved ones. Beauty is created out of imagination, wonder manifests itself from love, and  joy comes from the appreciation of ones work.  
For the last four years Heidi Nebecker who is a member of our art group has decorated a tree for the ChristmasTree Jubilee held in Ogden Utah at the David Eccles conference center.  Each year I am amazed at the beauty that comes from this girls heart and imagination.  She puts her whole heart and soul into each beautiful tree she decorates.  For this years Christmas Jubilee she created a Cirque De Noel themed tree.  The tree glitters with glass ornaments and garlands.  Cheerful St. Nick banners and teal taffeta fabric weave through the sparkled branches.  Animals are dressed in their finest attire as they await the arrival of Santa Clause in handmade hot air balloons.  A netting of lights and a charming hand cranked Ferris Wheel set the scene for magic and imagination. 

My pictures hardly do the tree any justice.  To see the tree in person is purely magical.

Each beautiful tree created for the Jubilee are auctioned off and the funds collected benefit the special-needs children of the Weber School District.

     
The magical details...


The animals are from the Bethany Lowe Halloween collection that Heidi redressed with Christmas attire. The small glittering lights at the base of the tree and on the Ferris Wheel are from Restoration Hardware .  They are the prettiest lights I have seen. 

The beautiful Christmas star are two seperate stars from the Pottery Barn that she glued together and glittered.  It is stunning!


To create your own magical hot air balloon follow Heidi's picture tutorial.

Blow up the balloon and tie a long string to the end.  Tie the balloon between two chairs pulling to get the shape of the balloon.


Apply wet plaster guaze over the bottom third of the balloon and let dry.
Dick Blick has a wonderful plaster cloth 


Tape a string to the other end of the balloon so you have a way to hang your hot air balloon.


Plaster the rest of your balloon and hang from a light fixture or closet rod.  Let dry completely and add a mixed joint compound that you can buy at Lowes or Home Depot.  Mix per directions dilluting the compound so it is thinner than sour cream.  Brush on the compound with a two inch brush.  The thinner the compund the smoother the finish will be.  When completely dry the balloon is ready to be sanded.  A foam sanding block works great.  


Create or purchase a netting and attach to a basket.  An old fishing net would be perfect.


Paint your hot air balloon and glitter it using a pretty German glass glitter or our BFF Martha Stewarts beautiful glitters.  Combine two colors of glitter like a silver and a gold to give it some depth.  Glitter your netting as well.  Attach netting and basket to the glittered balloon and decorate using christmas trims and tinsels, stars and such.


Christmas waves a magic wand over this world, and behold, everything is softer and more beautiful. 
Norman Vincent Peale


Enjoy the Season!
xoxo
Lorraine


Tuesday, November 13, 2012

HANDMADE PHOTO COLLAGE GARLAND


BEAUTIFUL


"Among many truths the speaker discussed,
 a woman needs to be told she is beautiful,"
  "She needs to be told she is valued.  She needs to be told she is worthwhile."
 
I am grateful for many people in my life.
Especially the beautiful girl you see in these pictures.
She is beautiful inside and out.
I adore her.


I wanted to give her something special.
And so I made this photo collage garland for her.
I printed these images from her Facebook Page.
 
 
I glued the images to heavy cardstock, and then covered the back with German music sheet paper. 
 I added some detail with pink thread in my sewing machine,
as well as scrapbook paper. 
 
 
I found words that perfectly describe her,
and surrounded them with German glass glitter. 
 
 
Wrapping each picture together with delicate wire,
 vintage crystals and pearls. 
 
It was a perfect gift for someone that I love so much
xoxoxo
Diana Camomile Peck

Friday, November 9, 2012

Post Some After Photos


Sometimes the "after" pics of Halloween pumpkins are better than the ones we see during trick-or-treating! A few years ago we were treated to an especially delightful rotting Jack on our porch. 

Anyone have a fun one to share?  Email to our blog's address, and I'll add them to this post.

Its a dreary, rainy Friday here, but here's wishing you a wonderful autumn weekend!

Marilyn